Company & Product
Radformation’s 2020 Year in Review
In an unpredictable year, we focused on creating amazing new tools, connecting virtually, and promoting big ideas.
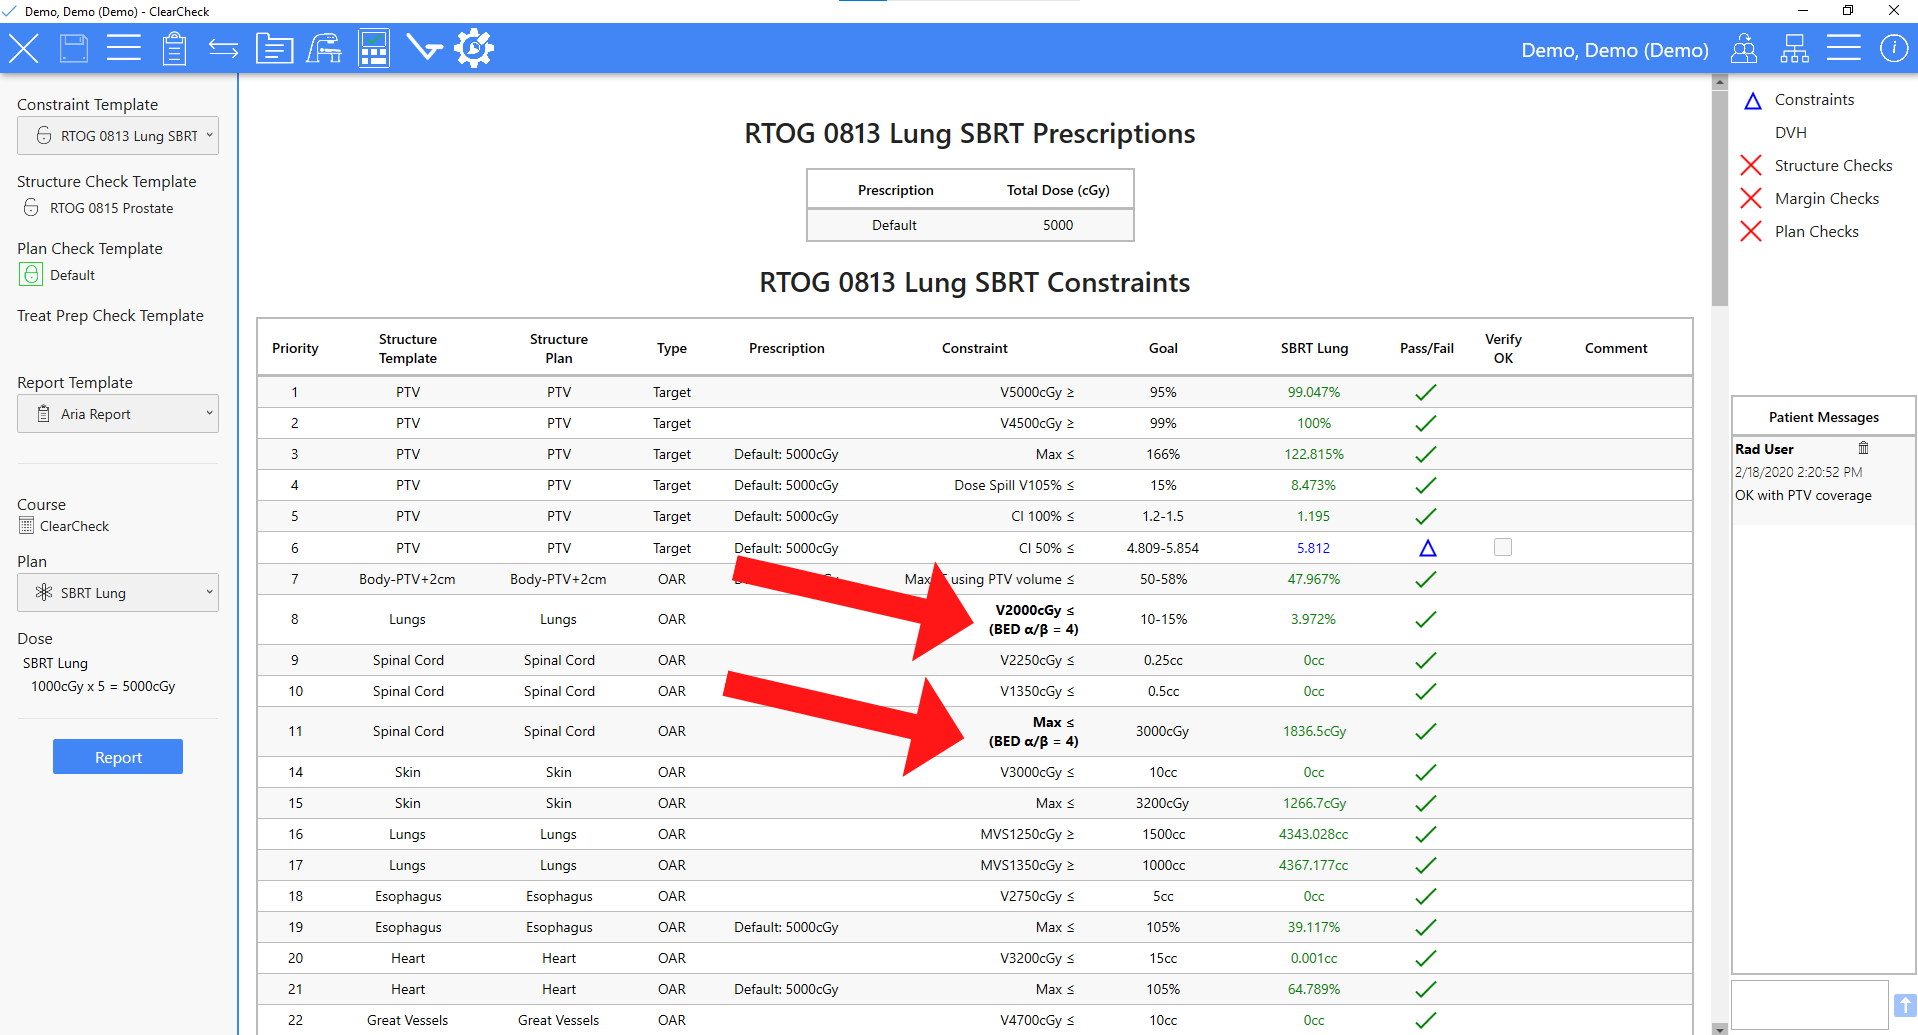
ClearCheck has new tools to provide key BED and EQD2 data. Here are a few tips on how to best utilize these tools.
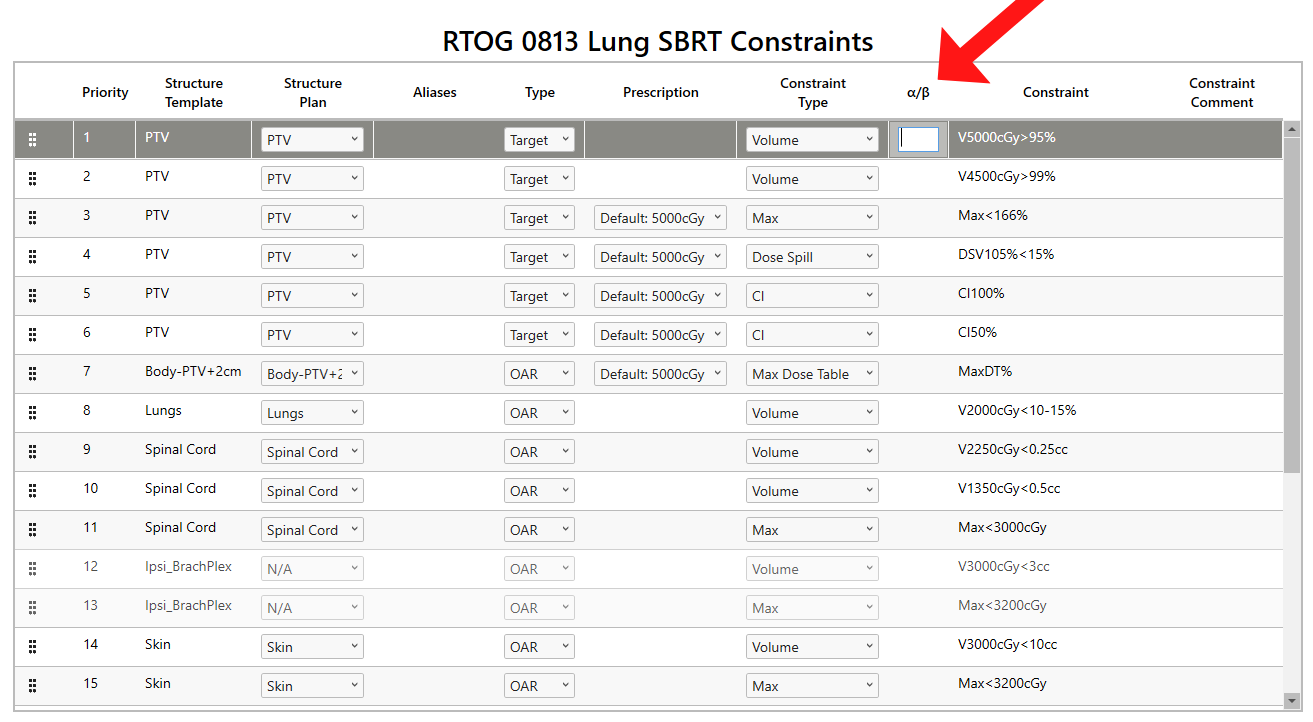
As a quick review, BED is a value that serves to quantify the biologically effective dose delivered using a tissue characterization parameter called the α/β ratio, the fractional dose, and the total number of fractions. Using the same parameters, one can arrive at EQD2, which gives the equivalent dose needed in 2 Gy/fx to achieve that effective dose.
The power of BED and EQD2 lies in the α/β ratio, which characterizes a tissue’s sensitivity to radiation. Tissues that are relatively resistant to the effects of radiation are given a low value, typically 3 Gy, and are called “late responding tissues.” In contrast, relatively radio-sensitive tissues usually have a larger value of around 10 Gy and are called “early responding tissues.” Each tissue has ratios derived from empirical research. However, 3 Gy and 10 Gy are often used for late and early tissues for general clinical purposes, respectively.
Let’s dive in to get started using these valuable quantities in the clinic. We’ll provide a few examples to illustrate the BED/EQD2 functionality offered in ClearCheck. These examples apply for all ClearCheck versions 2.0.15 and newer. If you are using an earlier version of ClearCheck and would like to utilize the BED/EQD2 tools, we strongly recommend upgrading to the latest version for the most accurate results.
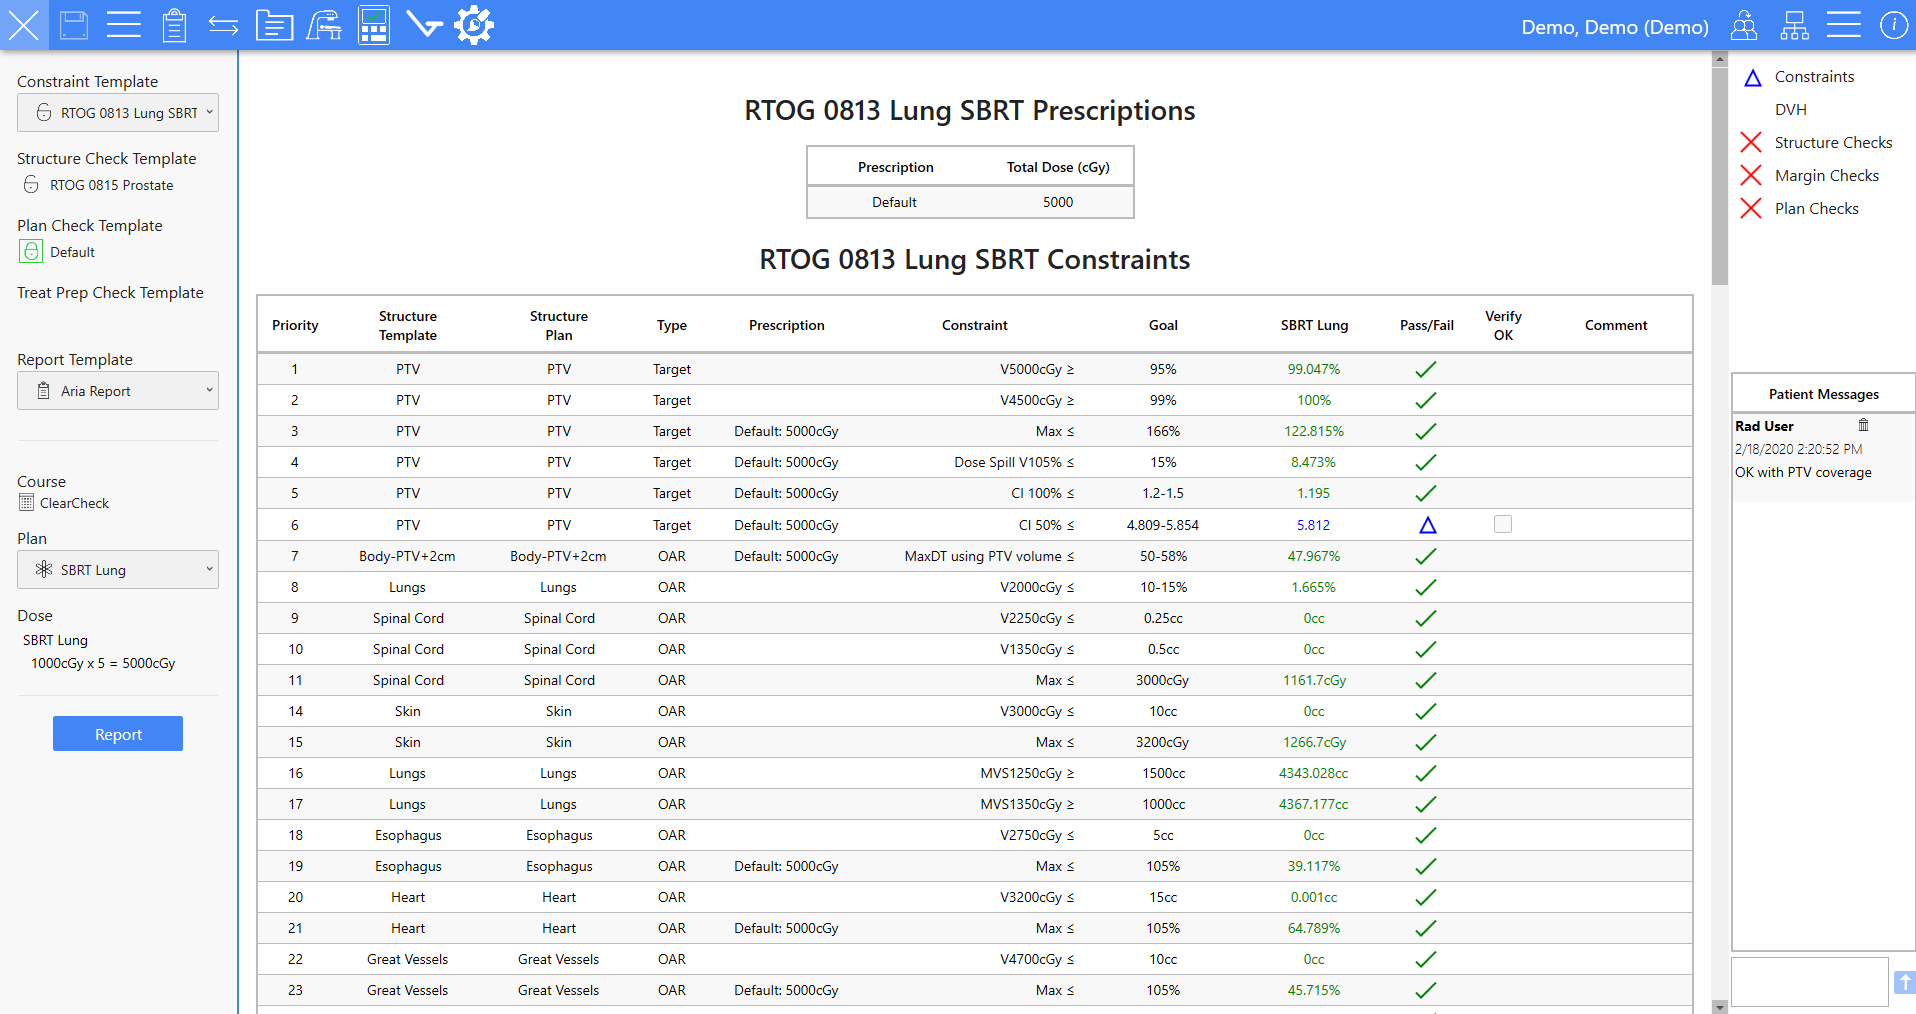
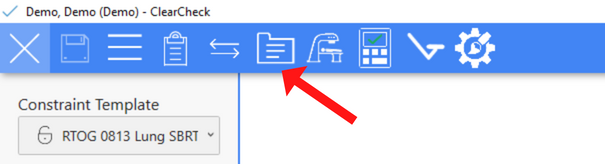
To begin, we need to have the correct course and plan opened and the desired constraint template. In the example below, we will be doing a 1000cGy x 5 SBRT Lung following RTOG 0813 dose constraints.

EQD2 constraints are most commonly used to convert HDR brachytherapy doses (generally 5-8 Gy/fx) to an equivalent 2Gy fraction dose to be compared to conventional dose fractionation constraints. It can also combine the doses from courses of treatment that do not have a similar fractionation scheme. One example would be to evaluate the cumulative Spinal cord max dose from a previous treatment plan (treated with 200cGy x 30) to the current SBRT treatment plan (treated as 600cGy x 5). Many retreatment limits on the cord, brainstem, bowel, etc., are defined based on EQD2/BED, so the SBRT plan dose would need to be converted before a proper evaluation can take place.
The standard approach uses the entire plan sum DVH based on the re-binning of dose voxels in each plan with appropriate fraction numbers applied. This is the recommended method for plan sums with the same CT/structure Set used for each plan or for plan sums where there is similar patient setup and organ position.
Conservative BED/EQD2 will sum equivalent dose values directly from each plan—as these values will lack spatial information—providing a worst-case dose scenario. This is the recommended method for two plans with very different patient setup or organ positions.
The biggest issue with Plan Sums is that there is no single parameter describing whether or not multiple plans are treated concurrently or sequentially, as this will affect the number of fractions required for the BED calculation. Here we’ll describe three potential plan sum situations encountered clinically. Each requires a different approach in terms of how constraints and DVH values are interpreted and merged. We’ll address each separately here:

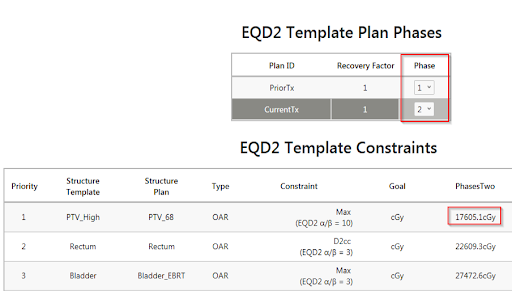
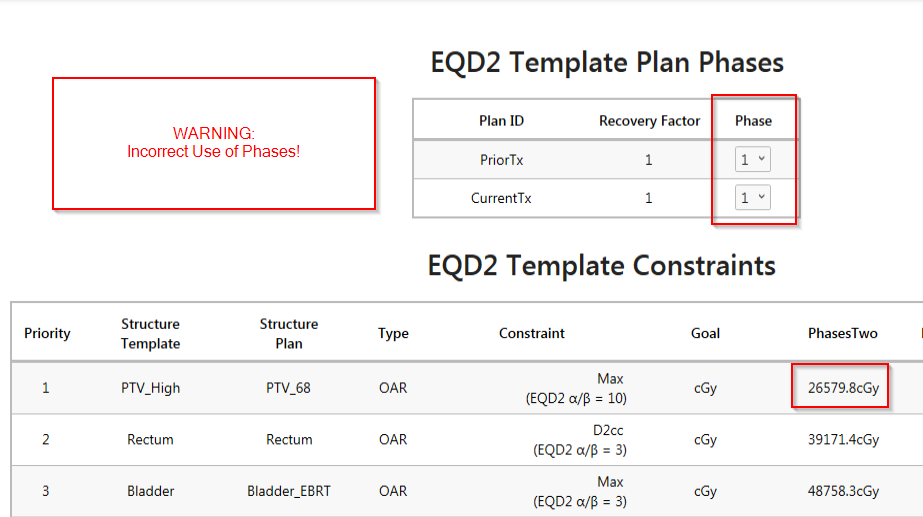
Rationale: Dose voxels are rebinned and converted via BED/EQD2 separately and then summed into a new DVH. This is necessary as the BED/EQD2 equation is quadratic and does not scale linearly.
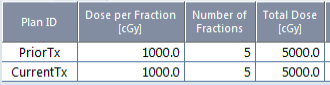
Example: PriorTx (1000 cGy x 5fx) + CurrentTx (1000cGy x 5fx)
Rationale: Since the DVH doesn’t provide any information about where the dose levels are within a particular structure volume, rebinning individual dose voxels becomes necessary as the hot and cold spots within the structure may be different between the two plans.
Example: Plan Sum: consisting of Prostate Nodes (25fx) + Prostate Only Boost (20 Fx)

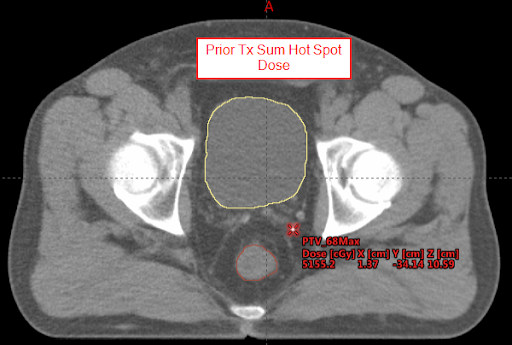
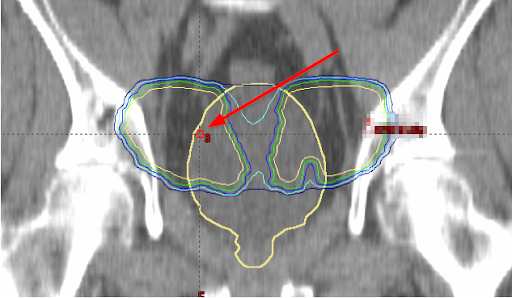
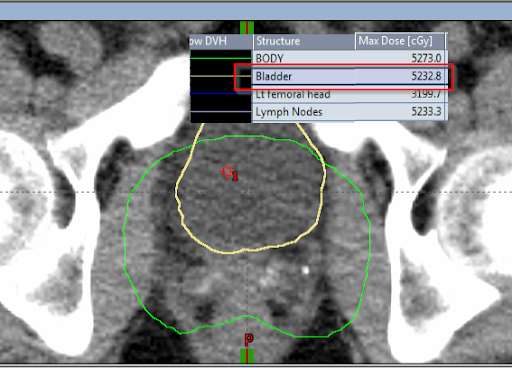
If we look at the location of the maximum bladder dose for each plan, it’s apparent that they are in noticeably different locations.
Below is the maximum bladder dose location for the Nodes 3D plan.
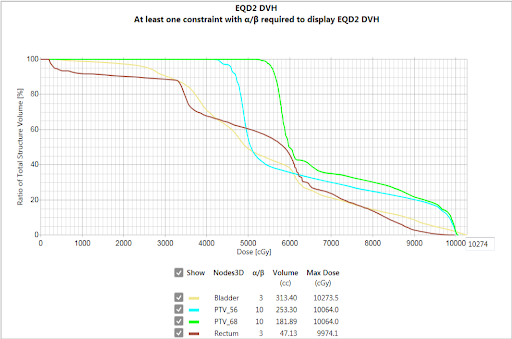
To resolve this, ClearCheck performs an EQD2 conversion on each plan and dose separately and then sums the converted dose clouds to create the BED/EQD2 DVH, shown below. Because the two plans share the same structure set, the resultant BED/EQD2 values accurately represent the converted plan sum with respect to each plan’s geometry.
This method will match the usual convention of summing “worst-case scenario” doses (i.e. hottest DMax from each plan even if they are in different parts of the volume), so it is possible to verify easily. This is generally the most conservative plan, but it will likely overestimate the true total dose.
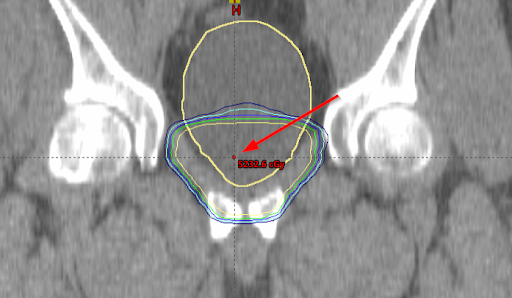
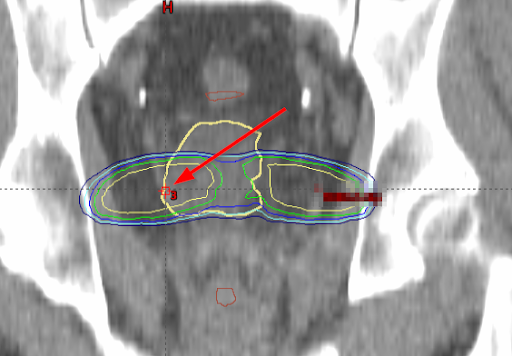
Nodes Bladder Max:
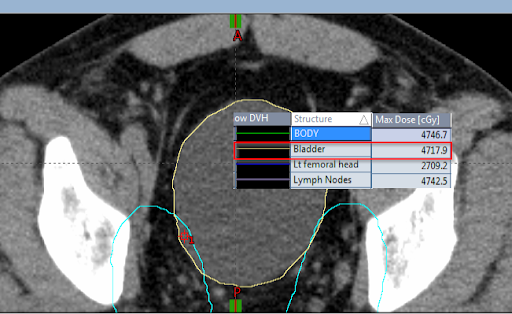
Boost Bladder Max:
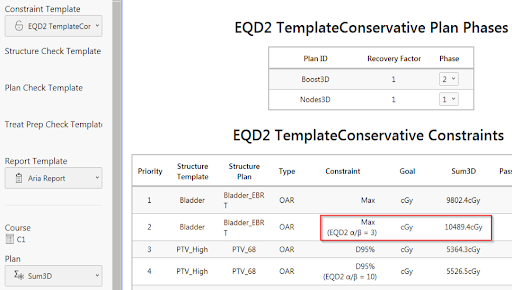
In ClearCheck, we have a Conservative EQD2 Bladder Max of 4611.4 cGy EQD2 + 5877.9 cGy EQD2 = 10489.4 cGy EQD2 (note the different locations within the bladder contour from which the dose max point is derived):
Example: Pelvis EBRT (25 fx) + HDR Brachy Boost (5 fx)
In this case, the approach is similar to situation 2a, but additional spatial uncertainty of the structures themselves along with dose spatial uncertainty needs to be accounted for. If a deformable image registration was applied, we could revert to situation 2a, as we would be able to map dose from one structure set onto another. However, standard rigid registration is often used in these scenarios. The structure location and position from the primary structure set are used, and the rigid registration is used to map the dose from the secondary structure set to the primary. In this case, organ motion or imperfect registrations introduce uncertainty. The dose voxels are converted as in Situation 2a and re-binned to a new DVH.
Again, choosing this option converts the individual plan DVH on its respective structure set directly to BED/EQD2 and sums the constraint values directly. This applies for Dose Max, Min, Mean, Median type constraints ONLY.
This method will match the usual convention of summing “worst-case scenario” dose (i.e. hottest DMax from each plan even if they are in different parts of the body) so it can be easily verified and is generally the most conservative way to plan. Still, it is less accurate to the actual total dose.
This is the most common method clinics currently use to evaluate dose from different scans or different treatment courses, as it has the benefit of allowing them to sum dose from prior plans that may not have a DVH calculated, and a single dose is assumed from a previous treatment.
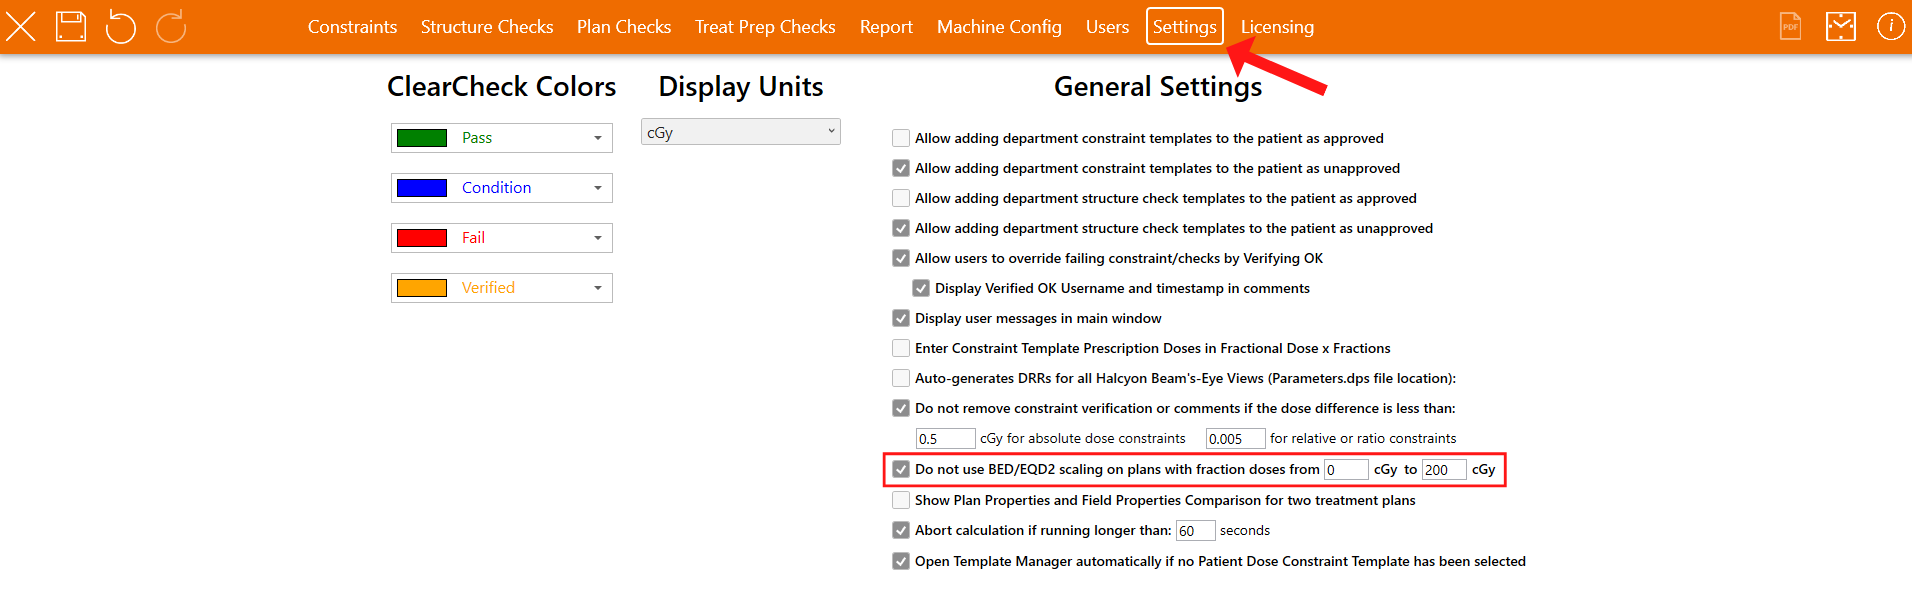
Within the ClearCheck Administration application, under the “Settings” tab, a checkbox allows the users to enable a range of fraction doses within which BED/EQD2 calculations will be ignored.

Leave a comment